


Thank you! Your comment has been submitted successfully. You should be able to view your question/comment here within a few days.
Error submitting comment. Please try again momentarily.
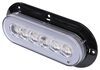
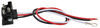
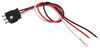
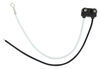
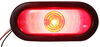
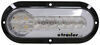
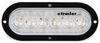
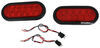
This 2-wire pigtail has a male plug on one end that pairs with the female connection on the back of your Optronics light. Color-coded wire lead is 10" long. Designed specifically for backup and utility lights.
Features:
Pigtail is a direct replacement for:
Videos are provided as a guide only. Refer to manufacturer installation instructions and specs for complete information.
Hello neighbors. It's Brad here at etrailer. And today we're taking a look at the Optronics two prong pigtail. Now this is gonna be for a reverse light function in a LED light here. Now, this is normally how you plug-in to get your reverse signal by tying into your reverse light wire. Now, the back of these actually have a two prong design and getting normal, but your pin connectors is kind of tricky to get those in place and that eliminates it.
It makes it plug and play. Once we attach our wires. So here we have our old light installed and we've upgraded our trailer to a seven pole, and that's gonna allow us to have that reverse light function. Well, just putting the taillights in place isn't gonna give us that function if we need to tie into it. So here we have our standard three prong floor, our turn signal, brake lights and running lights.
But for your reverse light signal there's gonna be this two prong. So to get that to work, we're gonna use our pigtail to plug in and we'll tie those wires in. And one of the first things you're gonna want to do is determine which wire has your reverse light function and have that routed down to pretty close around the taillight. We're then going to take our pigtail here and you're gonna see there's two wires. The red which is gonna tie into that wire and then just a white with a ring terminal for our ground.
So I'll go ahead and make our cut. And then we're just gonna strip this back a little bit. And the red's pre-stripped slightly, but I'm gonna go ahead and just get a little bit more on there. And then using a butt connector, we'll go ahead and get these crimped together. Now here, we're putting this in an enclosed trailer and all this wiring lives inside the trailer.
So it shouldn't be exposed to the elements. So if you're throwing reverse lights on a normal utility trailer or something that is exposed to the elements, I highly recommend picking up some heat shrink butt connectors which we have here at etrailer. And that way, once it's crimped down you can heat shrink that. And it's gonna seal that up making sure that water doesn't get in there. Now, once you've made your connections just give it a slight tug, just to make sure that it's actually connected properly. From here, we're gonna take our ring terminal and I'm gonna take a self-tapping screw, it's not included with the light, but you can pick those up here at etrailer or a local hardware store or if you have some lying around the garage and we're just gonna find a solid metal piece which we have a lot of our framework around here. So finding a spot shouldn't be too terribly hard. So just make sure that your plug is gonna be able to reach that reverse light signal there. And then once you have that determined you can go ahead and get your self tapping screw in place and anywhere that's solid metal that attaches to the frame is gonna be a great option. So now we have that mounted up. All I need to do is unplug our old light. Get our new one with that reverse light function in and plug it in. So there's our standard light there. And then our reverse here. It's just gonna plug in. You can see there's little slots here so it's gonna make it nice and easy to get this in place and get it tight. So you can see this little upswing here is gonna face towards the middle there. And once we have those bullet connectors lined up we can go ahead and press this in. It does take a little bit of pressure to get these to seat but it's gonna hold it in place very well. There we go. You're gonna want to hear that nice pop there. So you know that it's sealed and then all we have to do is put our light back in place and then test to make sure it's working. So now you can see we've gone ahead and put our vehicle in reverse. And our reverse signal is now working because we now have that connector. So pretty easy, simple installation to make your reverse lights work. Now, all that's left to do is go back, kind of clean up some of your wires with some zip ties get your panel back in place and then you're ready to start using your trailer with the reverse light function..
Customer Satisfaction Score:
99% were satisfied with this product
1% of customers were not satisfied
Ratings & Reviews


Nyfb4u2

8/21/2017
After a year using this product function-ability still performing as described. I recommend this product and seller.

Bryan
12/13/2021
1 year in and still working great!

Sean
6/29/2018
So far so good, they are working as expected and I may have to replace a few on the other side of the trailer with the same items.
Michael
6/7/2022
as expected


Jenny N.
11/15/2022
I can understand your disappointment with the lights. I will have our Customer Service team reach out to you.


Do you have a question about this Accessories and Part?
Info for this part was:
At etrailer we provide the best information available about the products we sell. We take the quality of our information seriously so that you can get the right part the first time. Let us know if anything is missing or if you have any questions.


















Craig
10/17/2017
Everything is good